
Table 10-4 summarizes the difference between the integration testing options.
| Table 10-4. A aomparison of service integration testing Service | Cost | Local overhead | Realism |
| Actual service | Medium | Low | High |
| Local emulator | Low | Medium | Medium |
| Local container | Low | Medium | Medium |
| Mock service | Low | Low | Low |
Building an Example Laboratory
Let’s show how all this fits together with a simple example.
In this case, you’ll use Cloud Code through the Cloud Shell Editor and use the provided Minikube for inner loop testing.
Because Cloud Code and Cloud Shell come with a local Minikube, you can work effectively locally. However, if you want to use a local IDE, you can use Cloud Workstations.
Tip
There is no charge for using the Cloud Shell Editor. It is essentially a free virtual machine with 5 GB of free persistent disk, so the state is stored between sessions.
It also provides a 2 vCPU, 4 GB RAM Minikube cluster included with the Cloud Shell instance, making this a zero-cost way of working with Kubernetes.
Start the Cloud Shell Editor
In your web browser, open Google Cloud console, as shown in Figure 10-5. In the top right of the Console, click the Active Cloud Shell button to open Cloud Shell.
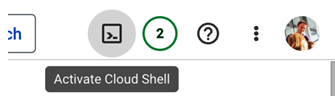
Figure 10-5. Activate Cloud Shell button
When Cloud Shell opens, click the Open Editor button to open the Cloud Shell Editor, as shown in Figure 10-6.

Figure 10-6. Open Editor button
Clone the Code
In the Cloud Shell Editor terminal, clone the Skills Mapper project using this git command:
git clone https://github.com/SkillsMapper/skillsmapper
Now in the Cloud Shell Editor, navigate to and open the cloned project; then go to the fact-service directory.
Enable Jib
You may remember this is a Java project that already uses Jib to build a container.
In the project, open the pom.xml and notice the Jib plugin in the plugin section:
<plugin>
<groupId>com.google.cloud.tools</groupId>
<artifactId>jib-maven-plugin</artifactId>
<version>3.3.1</version>
</plugin>
Init Skaffold
To initialize Skaffold, enter this command in Cloud Shell:
skaffold init –generate-manifests
Skaffold attempts to detect how your container can be built. As the pom.xml has the Jib plugin included, Jib Maven Plugin will be shown as an option.
Select (Jib Maven Plugin (org.skillsmapper:fact-service, pom.xml)).
When you see the prompt Select port to forward for pom-xml-image (leave blank for none), enter 8080. This will forward port 8080 of your local machine onto the Kubernetes service in the Minikube cluster, allowing you to connect.
The –generate-manifests argument causes Skaffold to generate Kubernetes manifests to use for deployment. As you do not have any at present, when prompted with Do you want to write this configuration, along with the generated k8s manifests, to skaffold.yaml?, enter y.
While the generated manifests are not ideal, especially as it generates default container names and labels to pom-xml-image, they are a good starting point.
In the build section, you have specified the fact-service image and the Maven project to build using Jib. The manifests section specifies the Kubernetes deployment to use to deploy to the local Minikube cluster.